![]()
So I just got a Raspberry Pi for Christmas and have been playing around with it a lot. Let me say that I love this thing! I have been looking at all the cool things you can do with this little toy and have settled on making a wifi security camera. For one because it is simple! Also, it seems to be the most useful way to use it. I did attempt to create a file server at first but I really didn’t like the way that it functioned. So I figured a security camera would be the next best thing.
Performance wise it’s definitely not the best. But it was again easy and cheap project that I think I will be using in my apartment for a while.
Right now, I have my Raspberry Pi B+ using a logitech 1.3 MP usb camera. I am getting about a frame or two a second so the feed looks similar to one of the gas station cameras. I have it sending the signal to a Windows 8.1 desktop in the other room. From there, I use iSpyConnect (click on the link for the website). iSpy does most of the work. It handles the motion detection, alerts and storage. I have it setup to dump all motion detected to MP4 files on a dropbox share. So each time a video gets captured it is sent to the cloud. As for the rest of the hardware all I have is a $7 wireless USB I bought from Amazon (click the link for the actual item).

Here is how I set all of this up:
- Setup your Raspberry Pi for the first time: Link!
- Make sure SSH was setup during initial installation.
- Install webmin so you have a web GUI (not necessary but makes things easier). Link!
- Install motion so you can interact with your webcam.
- Setup wireless configuration.
- Install iSpy on a Windows machine (on the same network).
- Install Dropbox (or any other cloud service) on the same Windows machine.
- Setup the camera on iSpy.
- Done!
Here’s where I’ll further elaborate on some of the steps:
2. After you login for the first time you should use sudo passwd to change the password of the user (pi by default). I made it a little easier on myself and used this:
- sudo su
- enter password
- passwd – to change root password
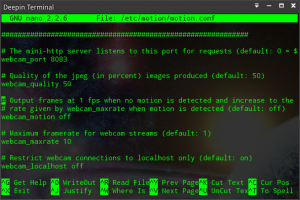
4. Install and configure motion:
- lsusb (make sure you can see your webcam if using USB webcam)
- sudo apt-get install motion
- nano /etc/motion/motion.conf (This is your settings file for motion)
- Make some changes here including max frame rate and server settings
- By default camera server is set to local host only…turn those settings to off so you can remotely connect
- From there you really don’t need to change anything else (could setup passwords)

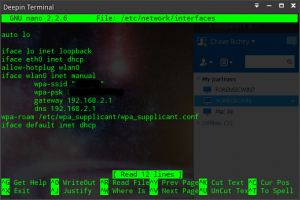
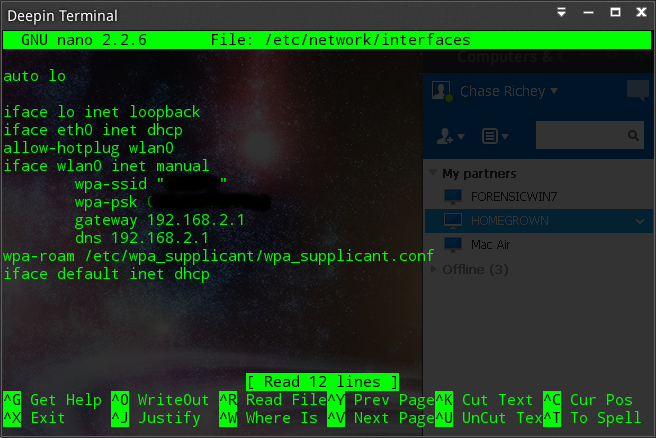
5. Setup WiFi on the Raspberry Pi:
- A lot of articles will tell you to use wpa_supplicant to setup your WiFi connection.
- I never got this to work so I recommend setting up your connect directly in interfaces (/etc/networking/interfaces)
- Here’s an example of mine:
6. Use this link to install iSpy on a Windows PC: Link!
- Once the application is install open it and click on add.
- Add IP camera with Wizard.
- On type of camera select Raspberry Pi and click next.
- Enter a username/password if applicable then click next again.
- Type in the IP address of the RaspPi if you know it (and the port specified in motion.conf) if not you can search for it.
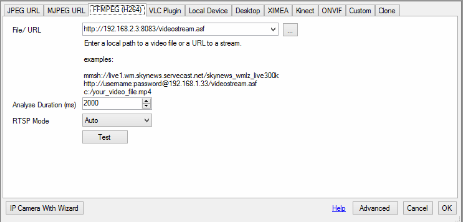
- On the next page iSpy will try to find the correct streaming link. Here’s the ones I used:
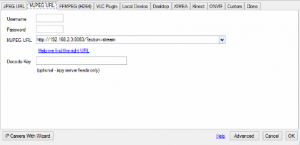
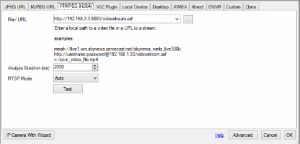
- In case you can’t read the two (image quality is bad): http://192.168.2.3:8083/?action=stream &
- http://192.168.2.3:8083/viewstream.asf
- Last edit your motion detection settings on iSpy in the edit menu.

7. If you want to save the videos to the cloud then you can setup a service like dropbox on the Windows PC.
- From there go back to iSpy edit menu and go to storage.
- Then navigate to your path.
One thought on “Raspberry Pi – Wifi Camera”